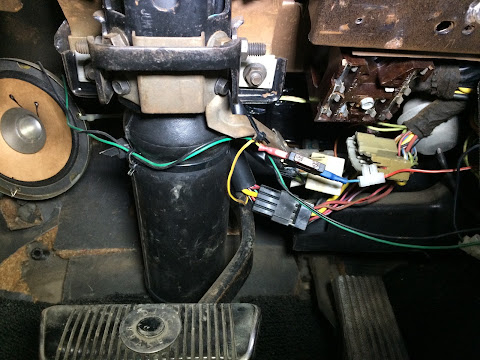
The first thing to do is disconnect the turn signal-wire. It's described as the "Quick coupler".
The guys at Ford or Haynes or wherever they came up with this name must've been from another planet where time goes reeeaaalllly slow because there is absolutely NOTHING quick about it!
It took me nearly TWO hours to get it disconnected. Maybe because I didn't remove my seat or something else but still! Bloody hell it was a royal PITA!
Initially I wanted to try and remove the old hardware intact but after looking at this.... You can see how the wires run through the bracket where it was nice and stuck.
Since I don't know what happens when I un-bolt everything I wasn't up for that much excitement and I decided to cut off the "quick coupler"and yank everything out.
So I unscrewed the three screws that hold down the turn signal hardware...
Don't forget this thing, whatever it is for.
And there it goes!
After I cleaned the inside I installed the new turn signal. Funny how there's an opening made to fit the quick coupler. So I figure in the factory they installed like this as well.
Screwing the new switch in place was easy. Now I had to run the cable through the column, not so easy...
Here's another photo from Haynes showing the steering column for a '73.
This is where the cable needs to go through. You can't do it without loosening up the steering column.
To get some wiggle room unscrew all these bolts and nuts. Nuts 'A' only need to come down a bit. Same with 'C' and 'B' can come out or leave in as long as the column can be moved.
Now there's enough room to squeeze the connector through. It's gonna take a lot of squeezing to get it in the same position as the original was. But you need it to be there again to get enough length to reach the connector.
All that's left now is to screw everything back together again :-)
EDIT:
After several unsuccessful attempts to ˜click~the connectors together I have given up and now a tie-wrap is holding them together. I didn't want to force them into eachother any more because I was scared that I might break one of the metal parts inside. It was holding without the tie-wrap but I don't want them to come undone while driving so there.


No comments:
Post a Comment