OK, another little upgrade on the progress.
The LH drop-off was showing some rust and also the LH quarter showed a bit of accident damage so I figured I should replace the drop off and lower quarter.
Rust in the drop off
Accident damage
I knew I was going to need a custom drop-off insert as the one that came with the lower quarter patch I bought was total shit. So I got a chance to work on my fabrication skills!
A custom made drop-off insert.
But then when I cut out the lower quarter I discovered more rust (surprise!) along the edge of the wheelhouse. It didn't look good...
To keep a little bit of progress I did weld in the drop-off panel to get that out of the way:
Now it was time for a bigger approach and I cut around the edge of the wheelhouse. And indeed, the whole edge was rotting away. Of course this is never cool to see but as I intend to end up with a rust-free car I am happy to tackle this now and now later.
Rusted edge.
Replacing the edge was a shit job due to misaligned pieces of metal, mainly the factory outer wheelhouse. It required a lot of welding, a lot more then anticipated.
Fixed wheenhouse edge.
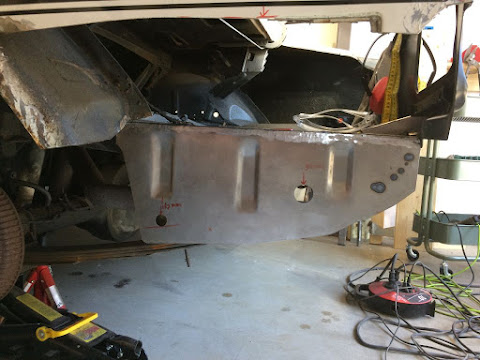
Now I was read to replace the quarter panel completely. I sanded where I was gonna cut and made pre-cuts to be able to fix the new panel to the car before welding. This way when cutting along the sides of the panel, the old sheetmetal will drop out by itself.
Leaving 2 places to temporarily rivet the panel to the body.
Riveted.
I used these awesome welding clamps to keep the sheet metal flush on both sides and also to keep a 1mm gap. Also when you put uour first welds close next to a clamp, you get less shrinking in your weld thus maintaining the gap:
Welding of the spots in the wheelhouse edge. There were quite a few, I think over 30:
At the rear more accident damage showed itself. It was badly repaired and I used my little hammer and anvil to make it flatter. Filler will do the rest.
And then it was time for welding around the sheet. Lots and lots of spots, very time consuming:
My custom drop-off insert fits beautiful:
All done with one area that will need attention in the future. The welding heat was too much here and the tension pulls a dent in the sheet metal in the circled area. I am yet to determine the best way to fix this. For now though, I am very pleased with having this job done!
---


