A blog about finding and keeping my 1973 Mustang Grande (V8 - 351C 2V). Produced on July 6, 1973. Sold in Florida, USA.
Showing posts with label LPG removal. Show all posts

Saturday, July 5, 2014

The before and after

Just to show the difference a little bit clearer...


This was the engine bay with all the LPG crap in it still...

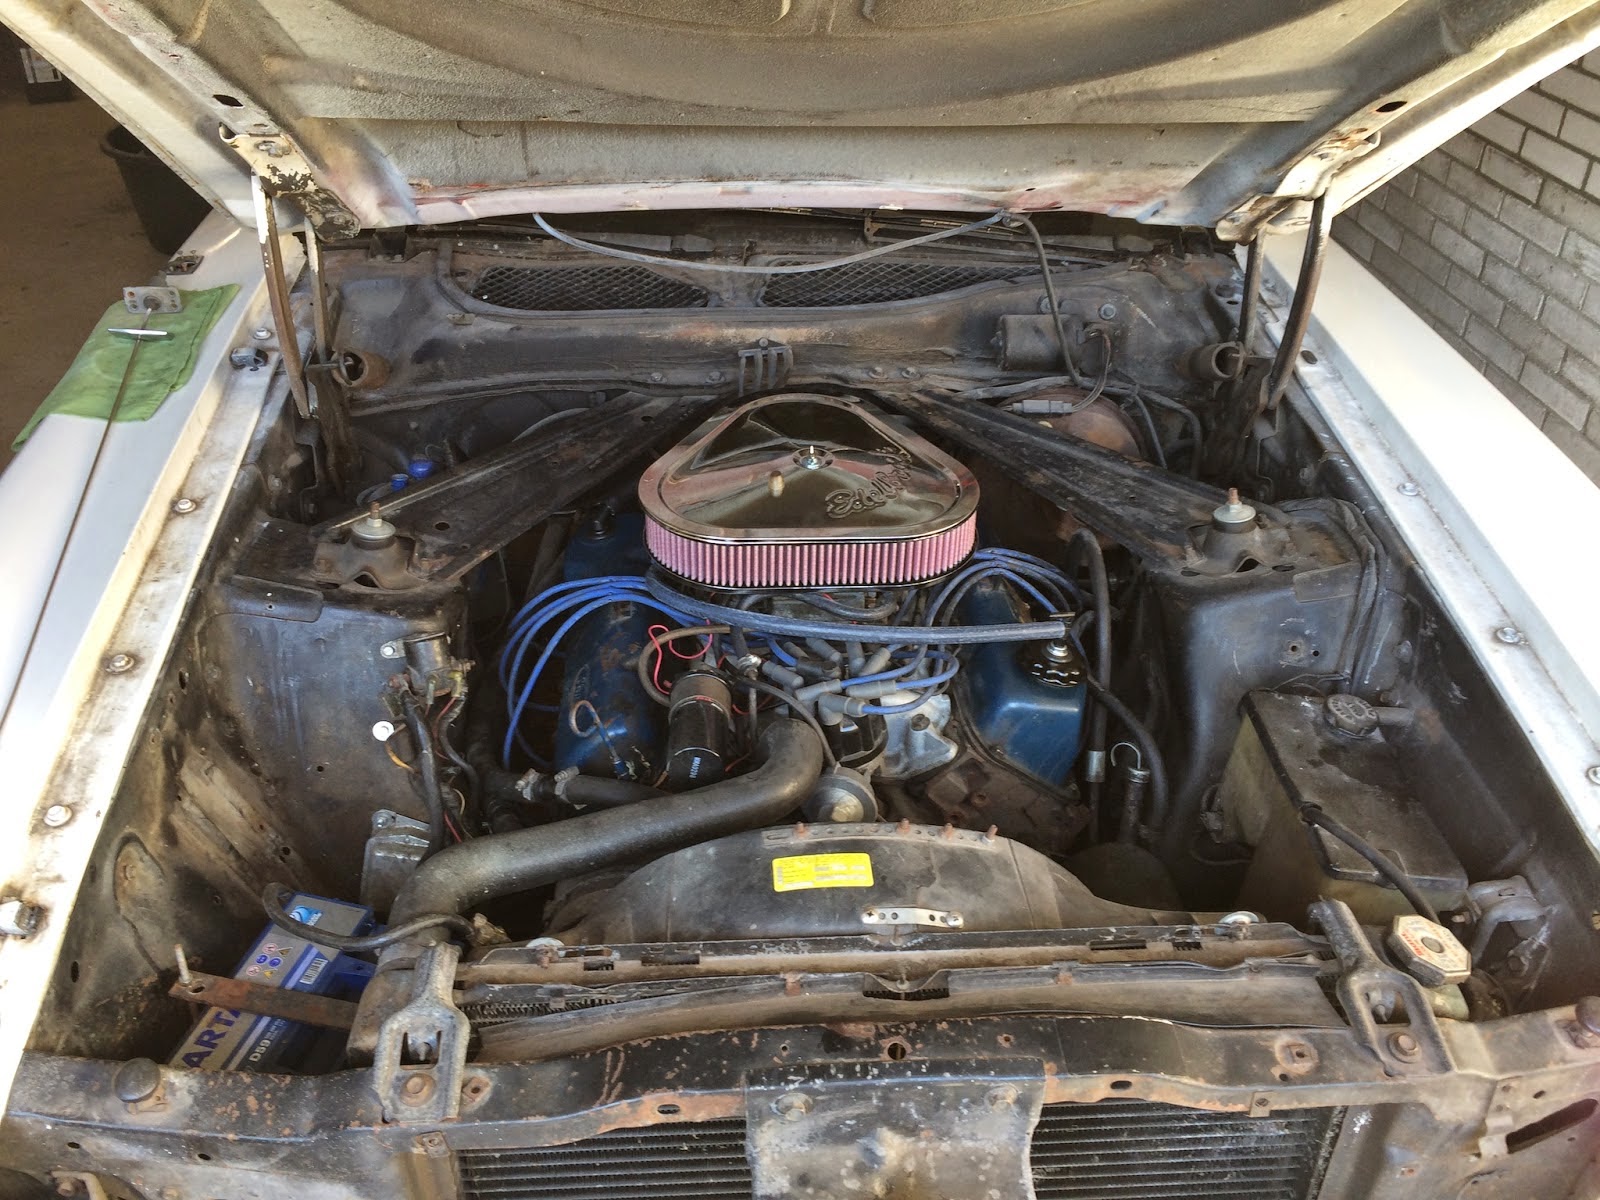
And this is after I removed it all.

Quite a difference I'd say :-)

Thursday, July 3, 2014

Finishing LPG removal / fixing the PCV system

Tonight I fully finished removing the LPG kit that was in my car before. The only thing left was to connect the 2 PCV hoses. These photos show the result of this in a couple of pictures.

The little cap sitting on top of the air cleaner used to seal off the PCV port on my carb. I forgot to put it away before making the pictures ;-)


The valve cover I replaced and the 2 hoses I hooked up.

And then it was time to see if the engine would still run. It hadn't run for a few months so it didn't start right away but eventually... it did! :-)

See for yourself:


Sunday, June 29, 2014

Removing and re-installing a valve cover

In my attempts to remove the tube (PCV to air-cleaner) sticking out at the back of the valve cover I was a bit rough and actually broke it. Since I wanted to take it out without hard bits of plastic falling in between the rockers etc. I decided to remove the whole cover so that I could replace it. Since I had never opened up an engine like this, the seemed a bit daunting. But hey, I gotta start some where :-)

The screws came out easy but the cover was quite stuck to the cork gasket. Eventually I managed to get it off but most of the gasket was still stuck to the engine. Great...

After screwing around with a stanley knife to scrape the cork off a friend told me about a special tool used to scrape off the remaining bits of the gasket. It's actually called a gasket remover. Wow...

So the next day I came back with the gasket remover and within 30 minutes I had cleaned all the remaining bits of gasket off the engine. I made very sure that no bits of cork fell in to the engine.

I also cleaned the valve cover and ripped out the old hose connector.

And replaced it with a new one.

Then I had to put in a new gasket and attach the cover again, too. Because everything was falling off (the gasket is really floppy) I put bits of metal wire in the screw holes to keep the gasket in place.

The wires also kept the cover in place. I then removed one piece of wire at a time, replacing it with a screw. Eventually I got the whole cover firmly attached again.

This was a nice little job and the first time I saw some of the inside of the engine. Nice!

Wednesday, January 29, 2014

Removing LPG parts / installing a new air cleaner

The ugliest part of my LPG kit is the air cleaner. It also sits on top of the carb and I need to know the type so the air cleaner needs to go. And because the fuel valve (also part of the LPG kit) is screwed to the air cleaner, it's going as well!

Above you see the "before" picture. U-G-L-Y...

I removed the air cleaner and finally managed to figure out what carburetor I got: A Holley 80457-2. Nice!

It's gonna need a bath at some point though but for now I'm leaving it in place. One thing I wasn't happy about is that they removed the choke plate when installing the LPG, an unpleasant surprise...

Then all I needed to do was replacing the fuel hose and valve with a new bit of hose.

And why not? I mounted my new air cleaner. It fits perfectly!

Doesn't this look a hell of a lot better than before?

Saturday, January 18, 2014

Removing my LPG tank

Today was a good day to remove my LPG tank. This was a job that made me very nervous since it had to do with volatile and flammable gas. But the weather was great and I was getting help from my best friend and good tips from some of the folks over at the Dutch Mustang & Ford Forum.

I drove the car outside as that is safer than doing this job indoors.

Mainly you deal with 2 (pipe)lines. The one from the filler port to the tank and the one from the tank to the engine. Both lines can be under pressure depending on wether or not they are closed by a valve on either end.

>>>>>>>>>> Don't forget to disconnect your battery <<<<<<<<<<

My biggest fear were malfunctioning valves, especially those on the tank. I thought the valves on the line to the engine would be the most trouble-free so I started with that one.

I rather released the gas from the engine-bay, which I did. This hissed for about 5-10 minutes and then it stopped. Good start!

In the trunk I first removed the air-hose from the tank and also I cut electricity to the electric valve.

I then disconnected the line to the engine from the tank. The wiring had to be pulled back out of the seal. Since I had released the pressured gas this was easy.

Now it was time for my new super sexy red gloves. Because they are made for working with liquids, they are also very suitable for poking your nose! ;-)

I put on the gloves just in case liquid LPG would spray out. This is quite cold you see.

Now the scary bit: disconnecting the filler line. This has a mechanical valve on the tank that not always closes properly because sometimes the line remains pressurised after filling the tank up.

To loosen up the valve I whacked it with a hammer a few times (not toooo hard!).

It was fixed very tight and I had to use quite some force to loosen it but in the end it gave way. This was a bit of an anti-climax as it only hissed for a few seconds and that's it. So thankfully I had a working valve and not a lot of pressure remaining in the pipeline :-)

Here is the whole tank disconnected. Yay! This took maybe 30-45 minutes, but only because we worked slow and very careful.

Since everything went so quick we decided to also remove the bracket and later we even removed all the pipelines.

One tank. And only some LPG parts left under the bonnet.

Great stuff!